Velomobile: Pixels to plastic

900MM STATION

900MM STATION FRAME

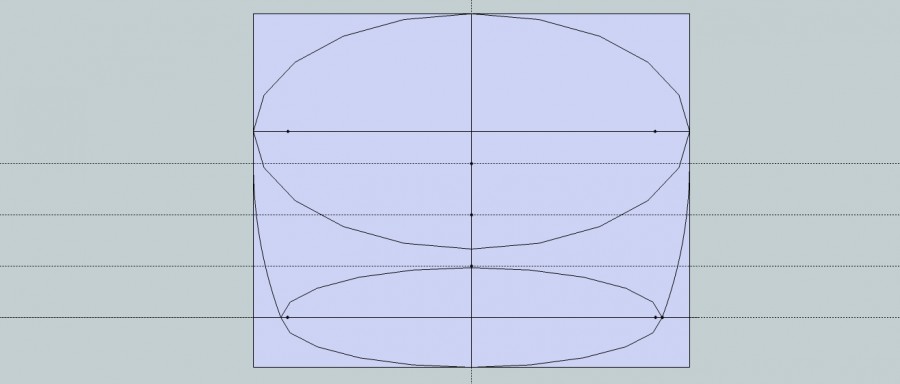
Once we had agreed the drawing Layout One.1 was a good starting point for a build, I started the process of converting the outline drawings to working ones. This means placing the 28 lengthways 15 mm pipe (longerons) inside the outer skin. I started with the 900 mm Station and made it the Master. This has a registration box that is used in each seperate Station, and remains identical throughout. My initial idea was to print the Station on to paper and use that as a template to cut flat boards. The registration box stops the programme deciding what size each one is best for you.

IMG_2570

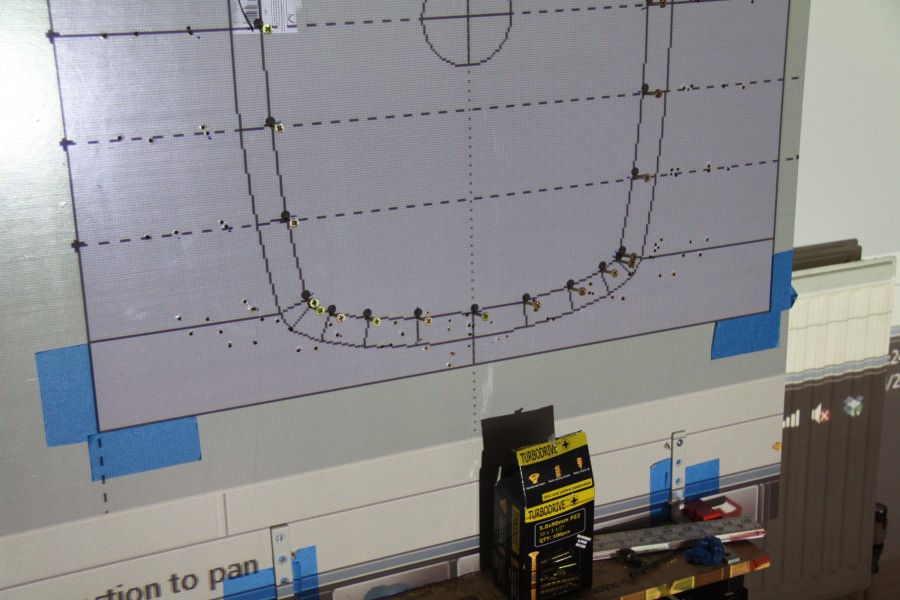
Two things happened about the same time, I bought a laptop projector and Davy Jamieson introduced me to underfloor heating pipe. At 16 mm it has 2 layers like the PVC plumbing pipe, but it has an added layer of aluminium. When you bend it it retains the shape. I redid the drawings with 15 mm and 16 mm pipe and projected the drawing directly on to a board, taped in the registration box on the board and the feet of the Workmate and tripod on the floor

.IMG_2574

IMG_2576

IMG_2577

IMG_2582

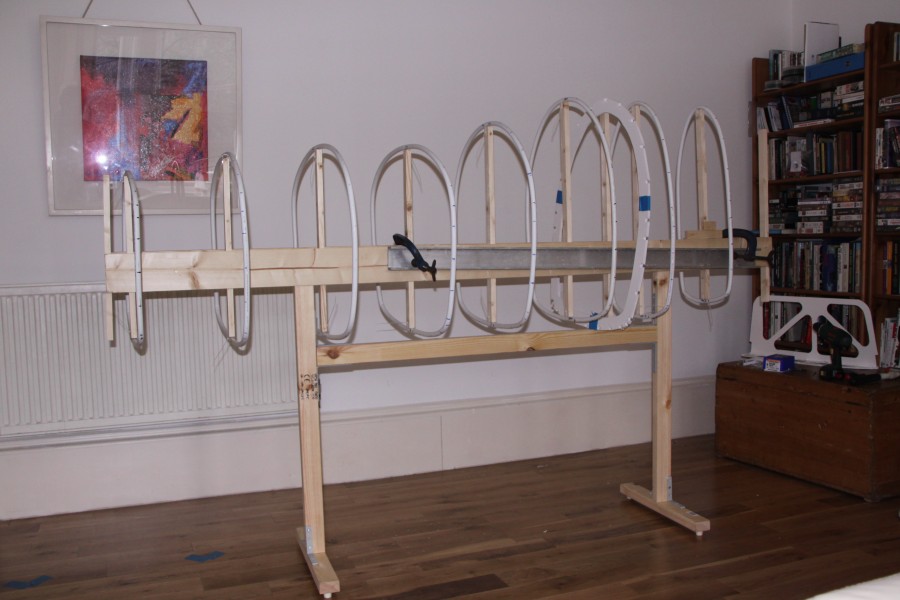
I built a frame called a Strong Back to support and keep all the Stations properly spaced and in line. I should have stayed with my first plan of using aluminium extrusions. It is more expensive but it would not have twisted and warped like the timber in the centrally heated atmos. However this failure has lead to a solution which could give great benefits to structural frame strength and building simplicity, more later.

IMG_2598_2

IMG_2600_2

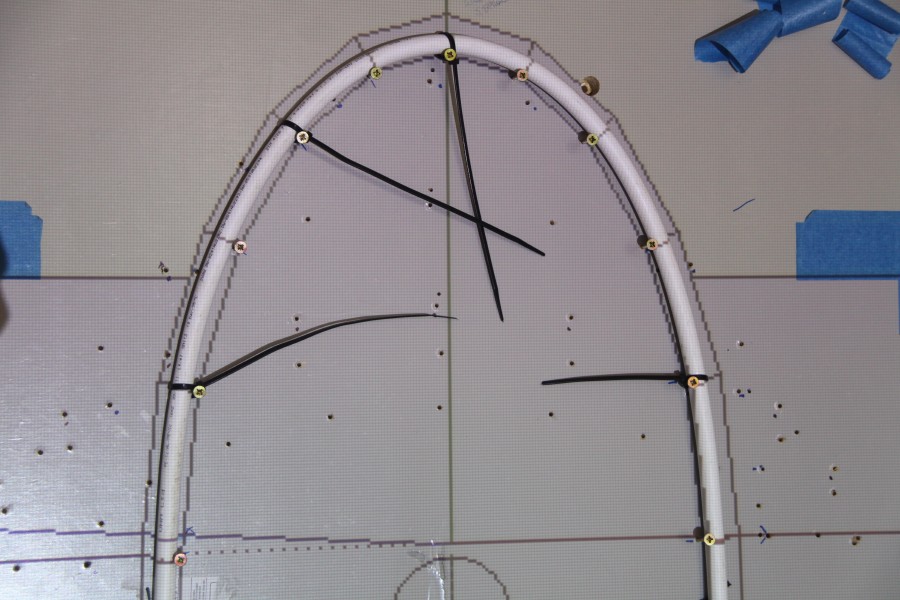
Charles and I then lashed the structure together loosely with zip-ties. At this stage nothing is really finalised, the drawing is one thing, what we have here is another and it can be useful go with what evolves rather than rigidly pursue an ideal.

RepRap 3D printing

Trying to describe what I wanted to do proved to be very difficult. I realised I needed a 3D drawing package, I asked a few people where to start to look. The range stretches from Free-ware to professional packages costing many thousands of pounds. The general consensus was to go for Blender, it is a package used for modeling 3D animated figures and rendering illustrations. The modeling principle is essentially creating a form in 3D space and then distorting it until you arrive at a result you can live with. I found it’s a very good programme, but not the way I wanted to work. I tried a couple of 3D CAD samples but they were massively competent but quite clumsy to handle, just too much.RepRap Prusa Mendel

At this time, a couple of years ago. I became aware of 3D printing. After a fair amount of surfing and reading I discovered http://reprap.org/wiki/RepRap A project started at Bath University under the leadership of Adrian Bowyer. It is Open Source and has had a huge influence in spreading the technology of 3D printing. RepRap stands for printers which can (self) REPlicate RAPidly. This is exactly what I was looking for. I could draw it in 3D, print it, develop the thinking and forms, redraw and reprint.

The process starts with a drawing made in Sketchup http://www.sketchup.com a free-ware programme which started life as an architectural CAD package and has developed into product design and sketching. The simple drawing is then transferred to Slic3r where the object is “sliced” into 0.25 mm layers, this data is then transferred to Pronterface where it is converted into G-code to instruct the machine on how to move and with the correct amount of plastic. Sketchup is a great programme because it appears simple, very straight forward and accurate. I regularly work in 3 decimal places of a millimeter, that is sufficient for what I want to do at the moment.

IMG_2608

I bought a Prusa Mendel machine kit and built the mechanical hardware. I needed help with the electrics and a friend Walter Galbraith, a lecturer in Electronic Engineering, came and sorted out the wiring. I don’t speak electricity at all. It started as a hobby, building and learning about this new machine and getting it running. I was working on another project and realised I needed a clamp to hold some tubing in place. I measured up the pipe, drew it up in Sketchup, put it through Slic3r, Proterface and started to print in 17 minutes. The end result is EXACTLY what I need, not close or just about, but exactly what is needed. At this point the printer changes from an interesting past-time to an essential tool.

IMG_2576_2